


Terraform, developed by HashiCorp, is a powerful open-source tool that enables users to define and provision cloud infrastructure using a high-level configuration language. It supports various cloud providers, including Amazon Web Services (AWS), allowing for the automated creation and management of cloud resources.
This guide will equip you with the knowledge to initialize a Terraform project, define AWS as your provider, create resources, and manage infrastructure changes with Terraform's syntax.
Prerequisites: Ensure you meet the following requirements before beginning:
An active AWS account with permission to create resources.
A basic understanding of AWS services, particularly EC2 Instances.
STEP 1: Create an AWS User with Programmatic Access
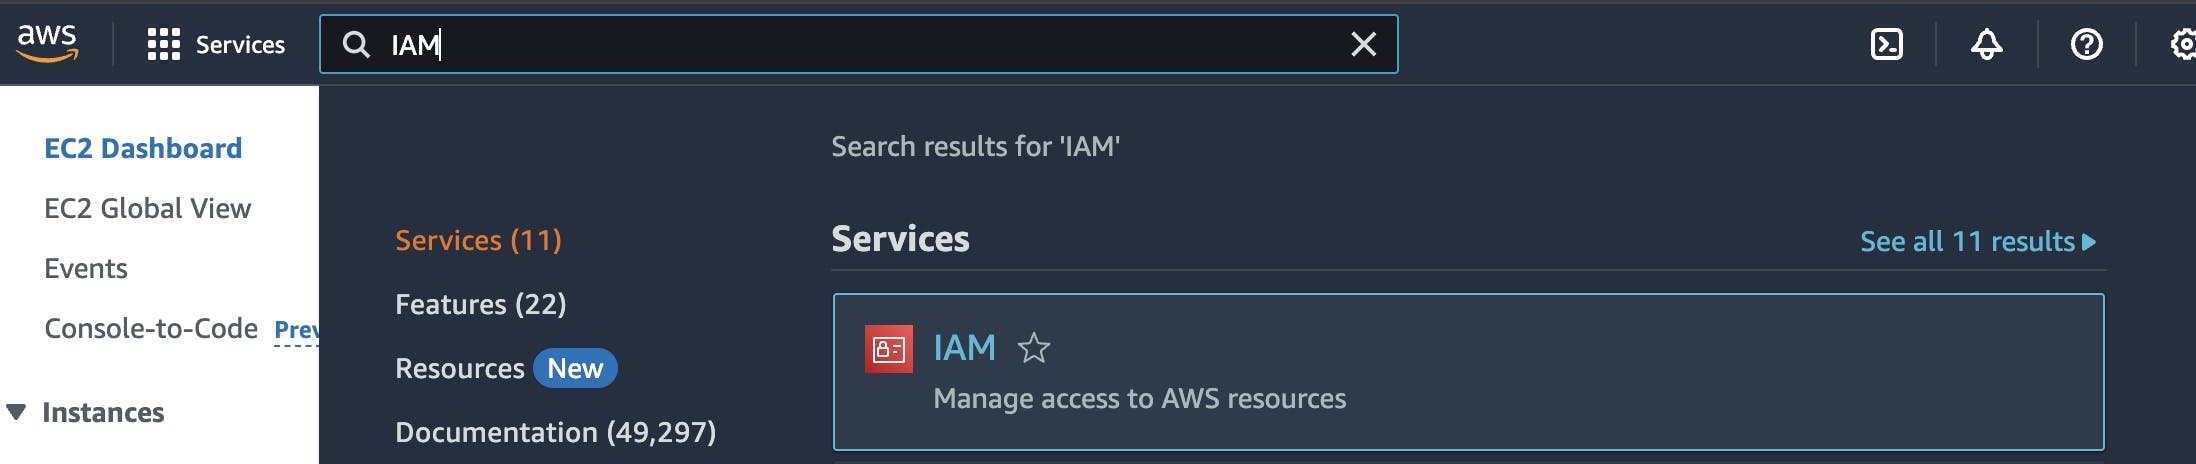
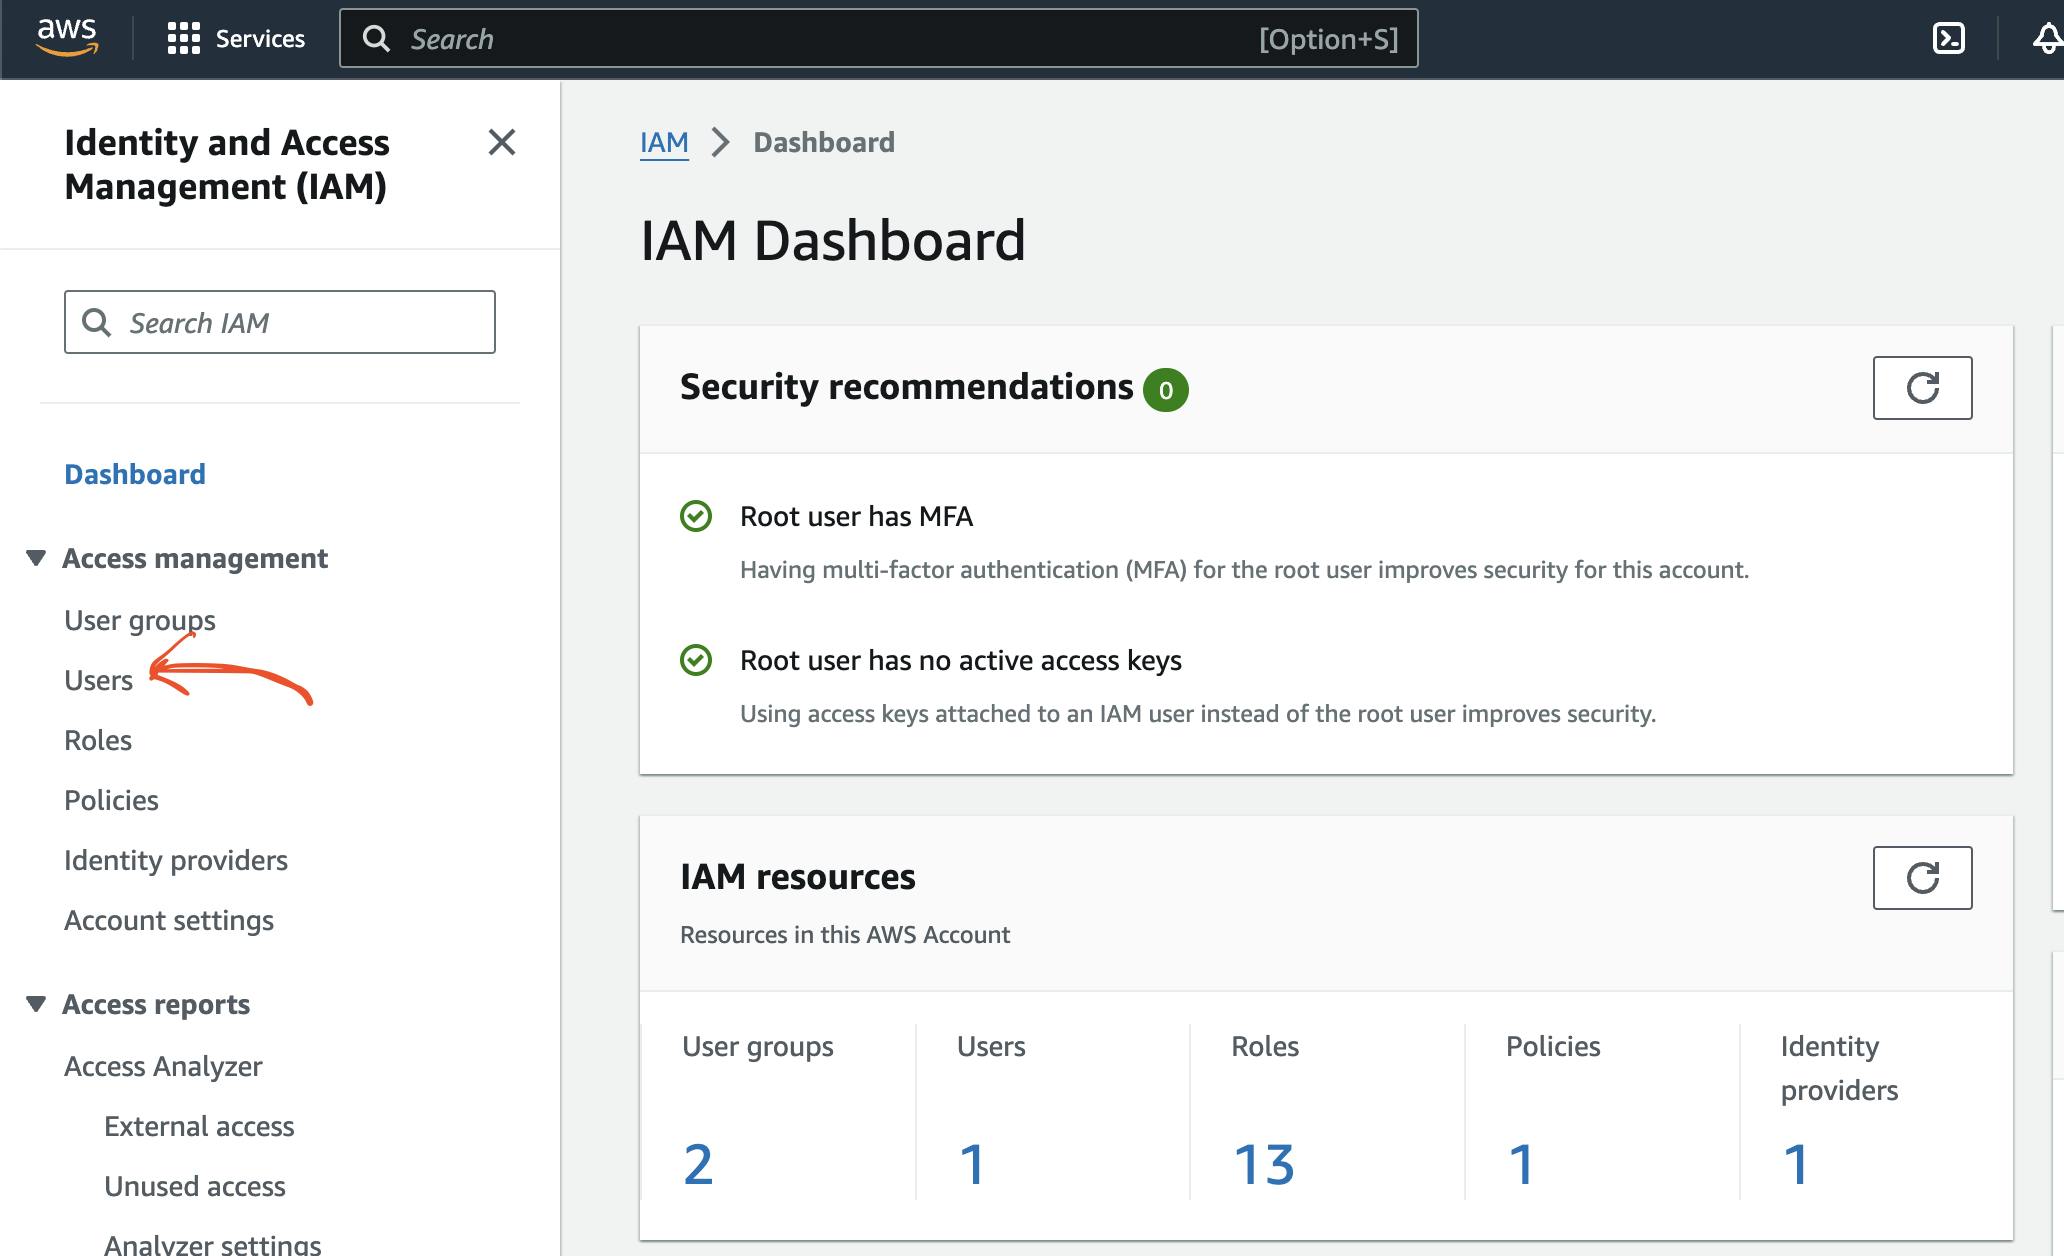
Log into your AWS account and access the IAM dashboard by searching for "IAM" in the services search bar
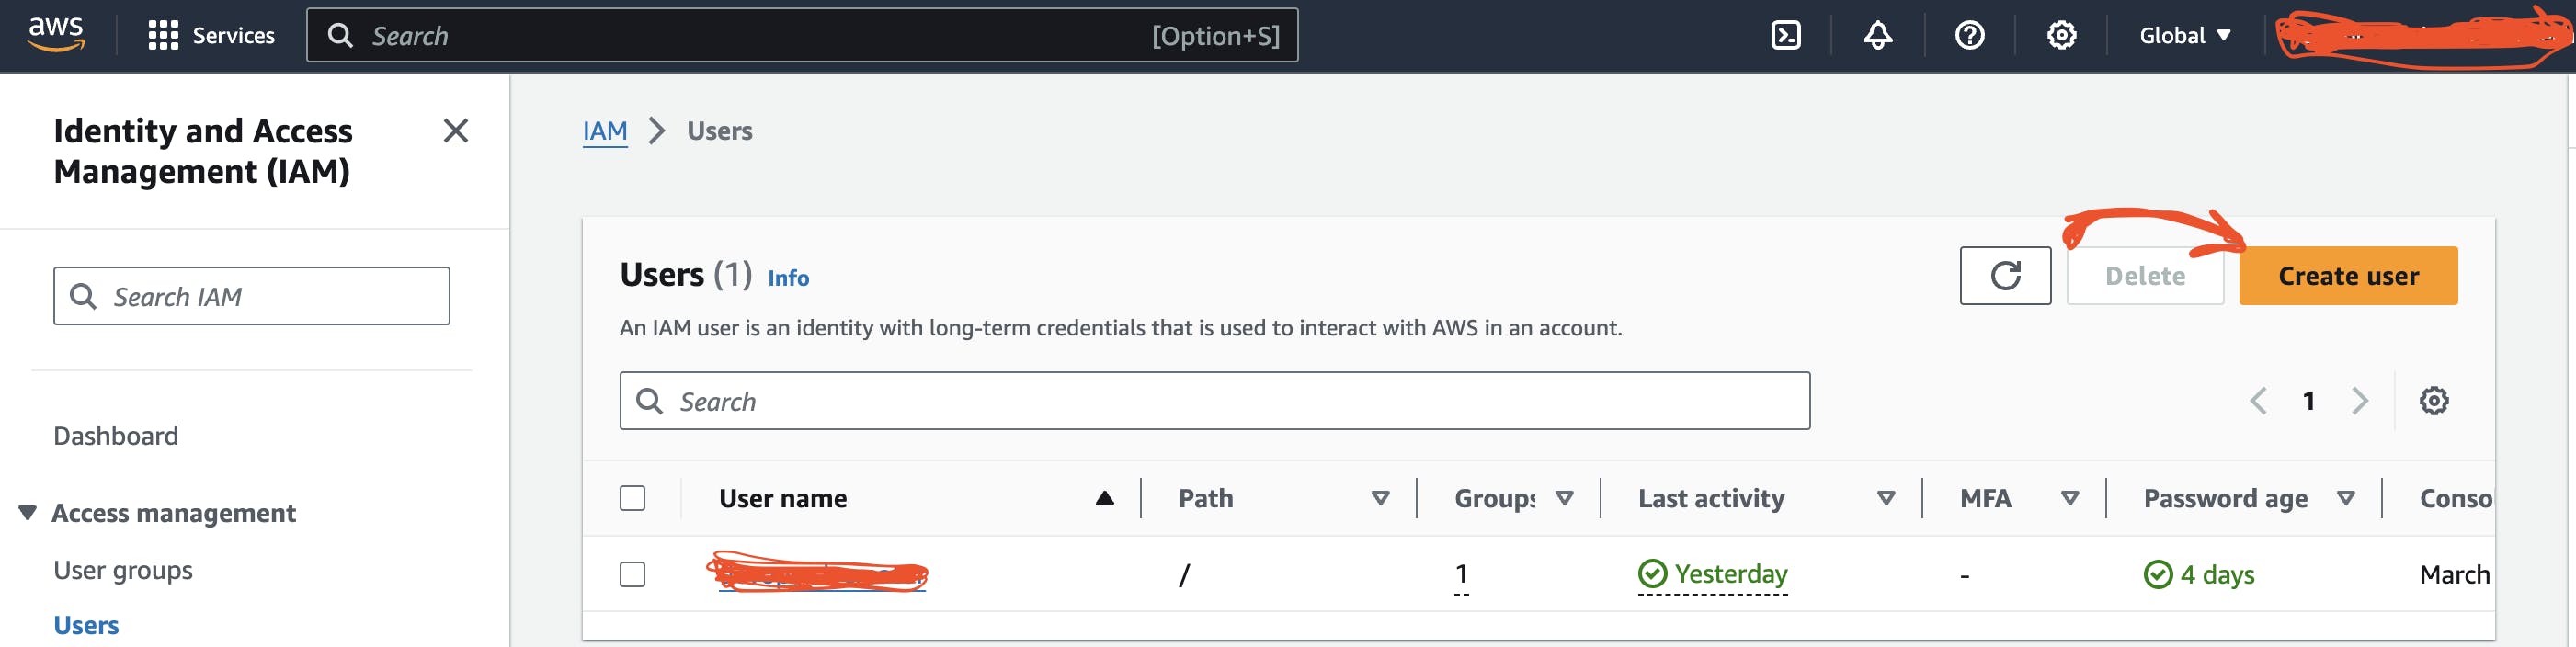
Click Users on the sidebar
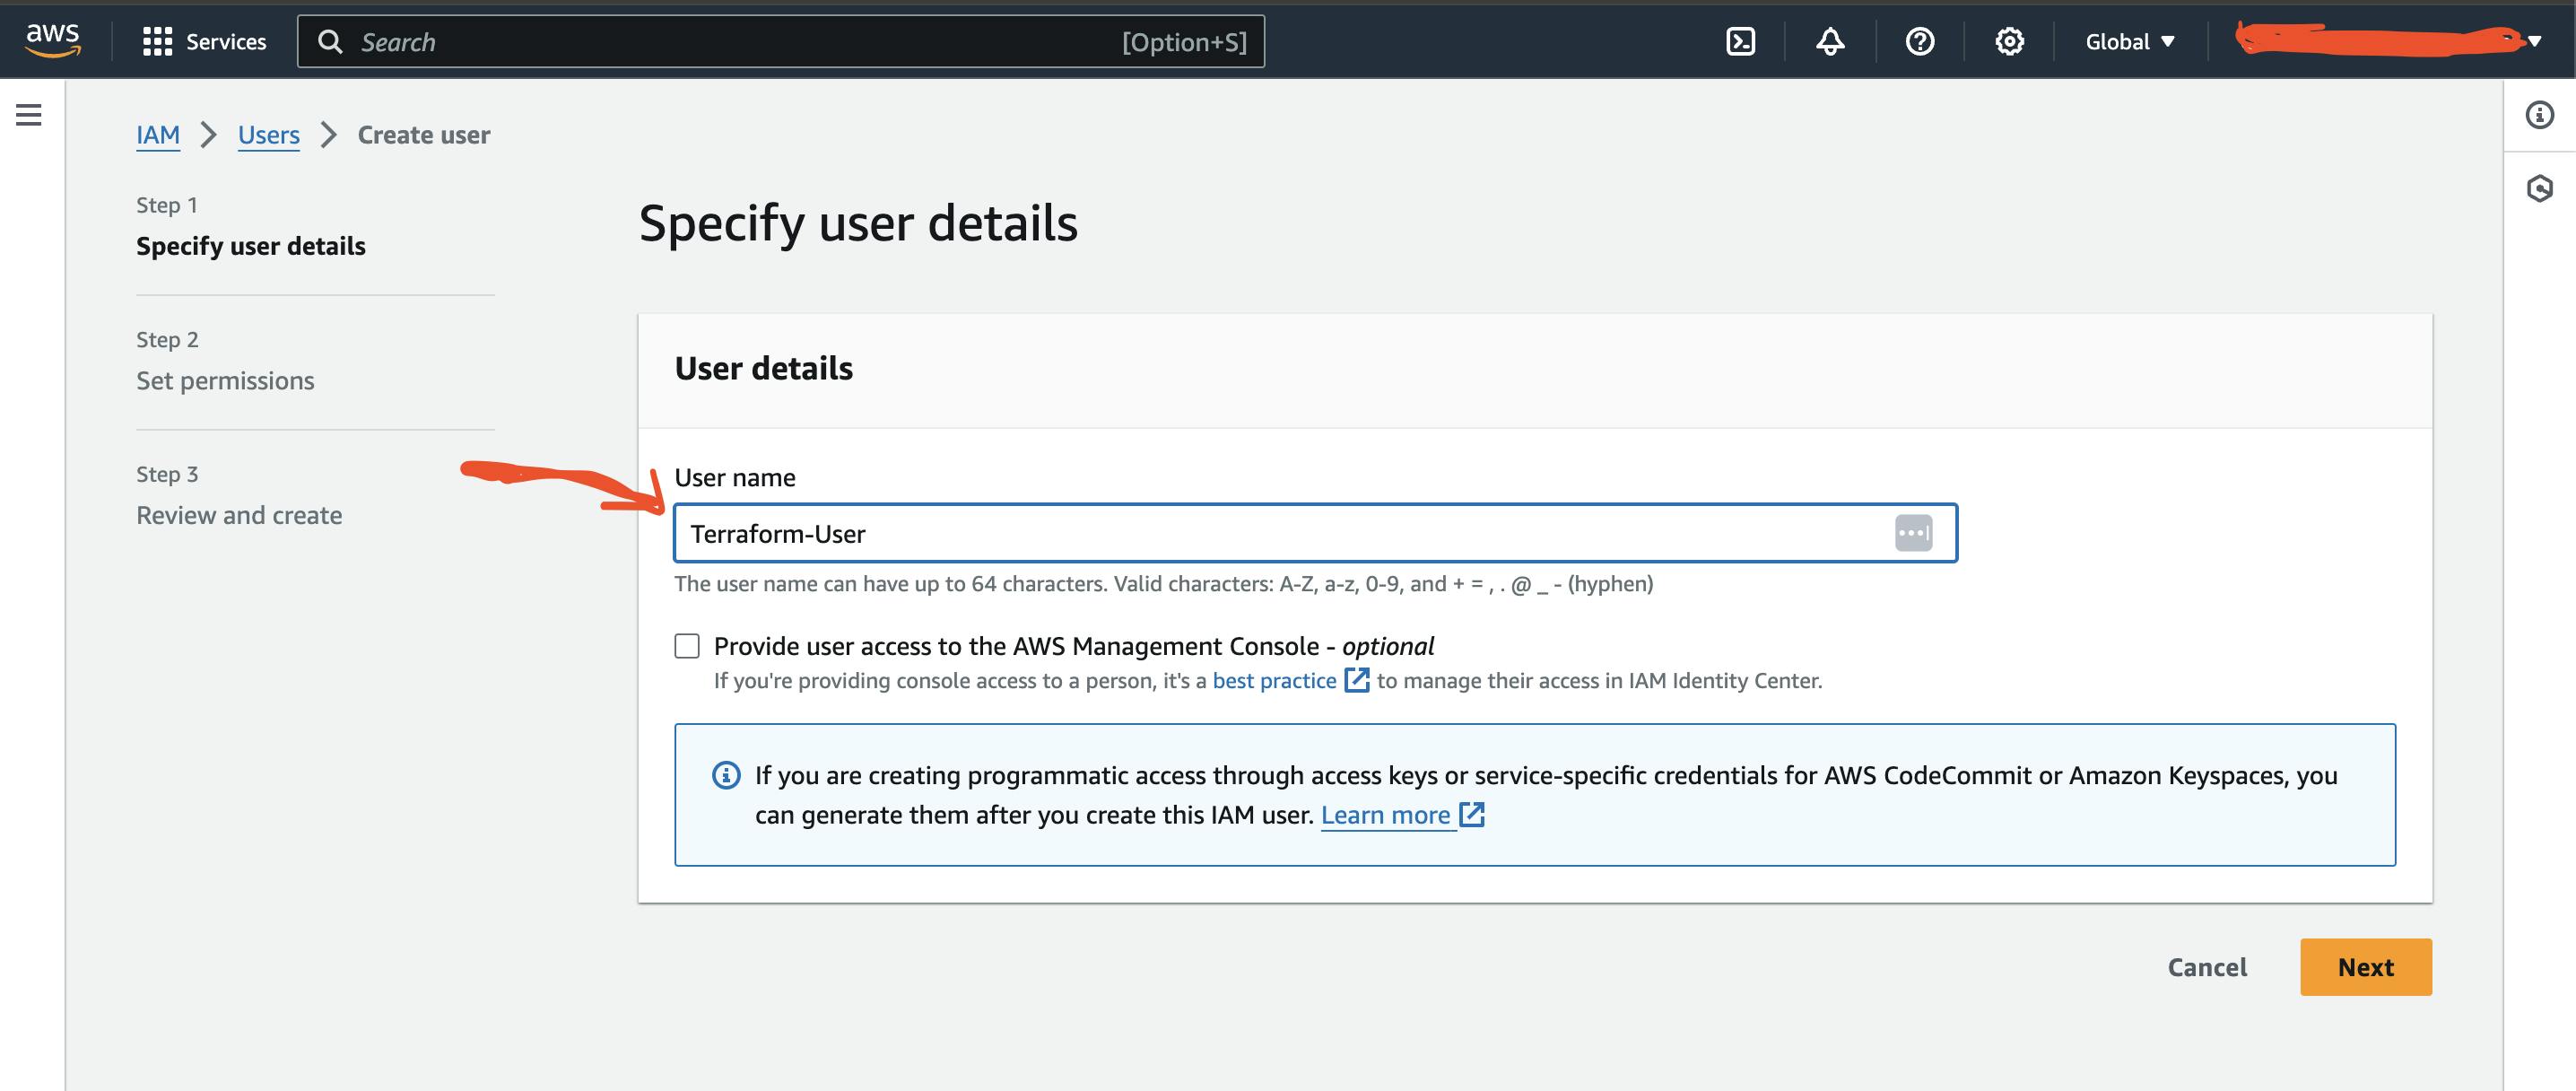
Click on Create user, Fill the name of the user name and then click on Next.
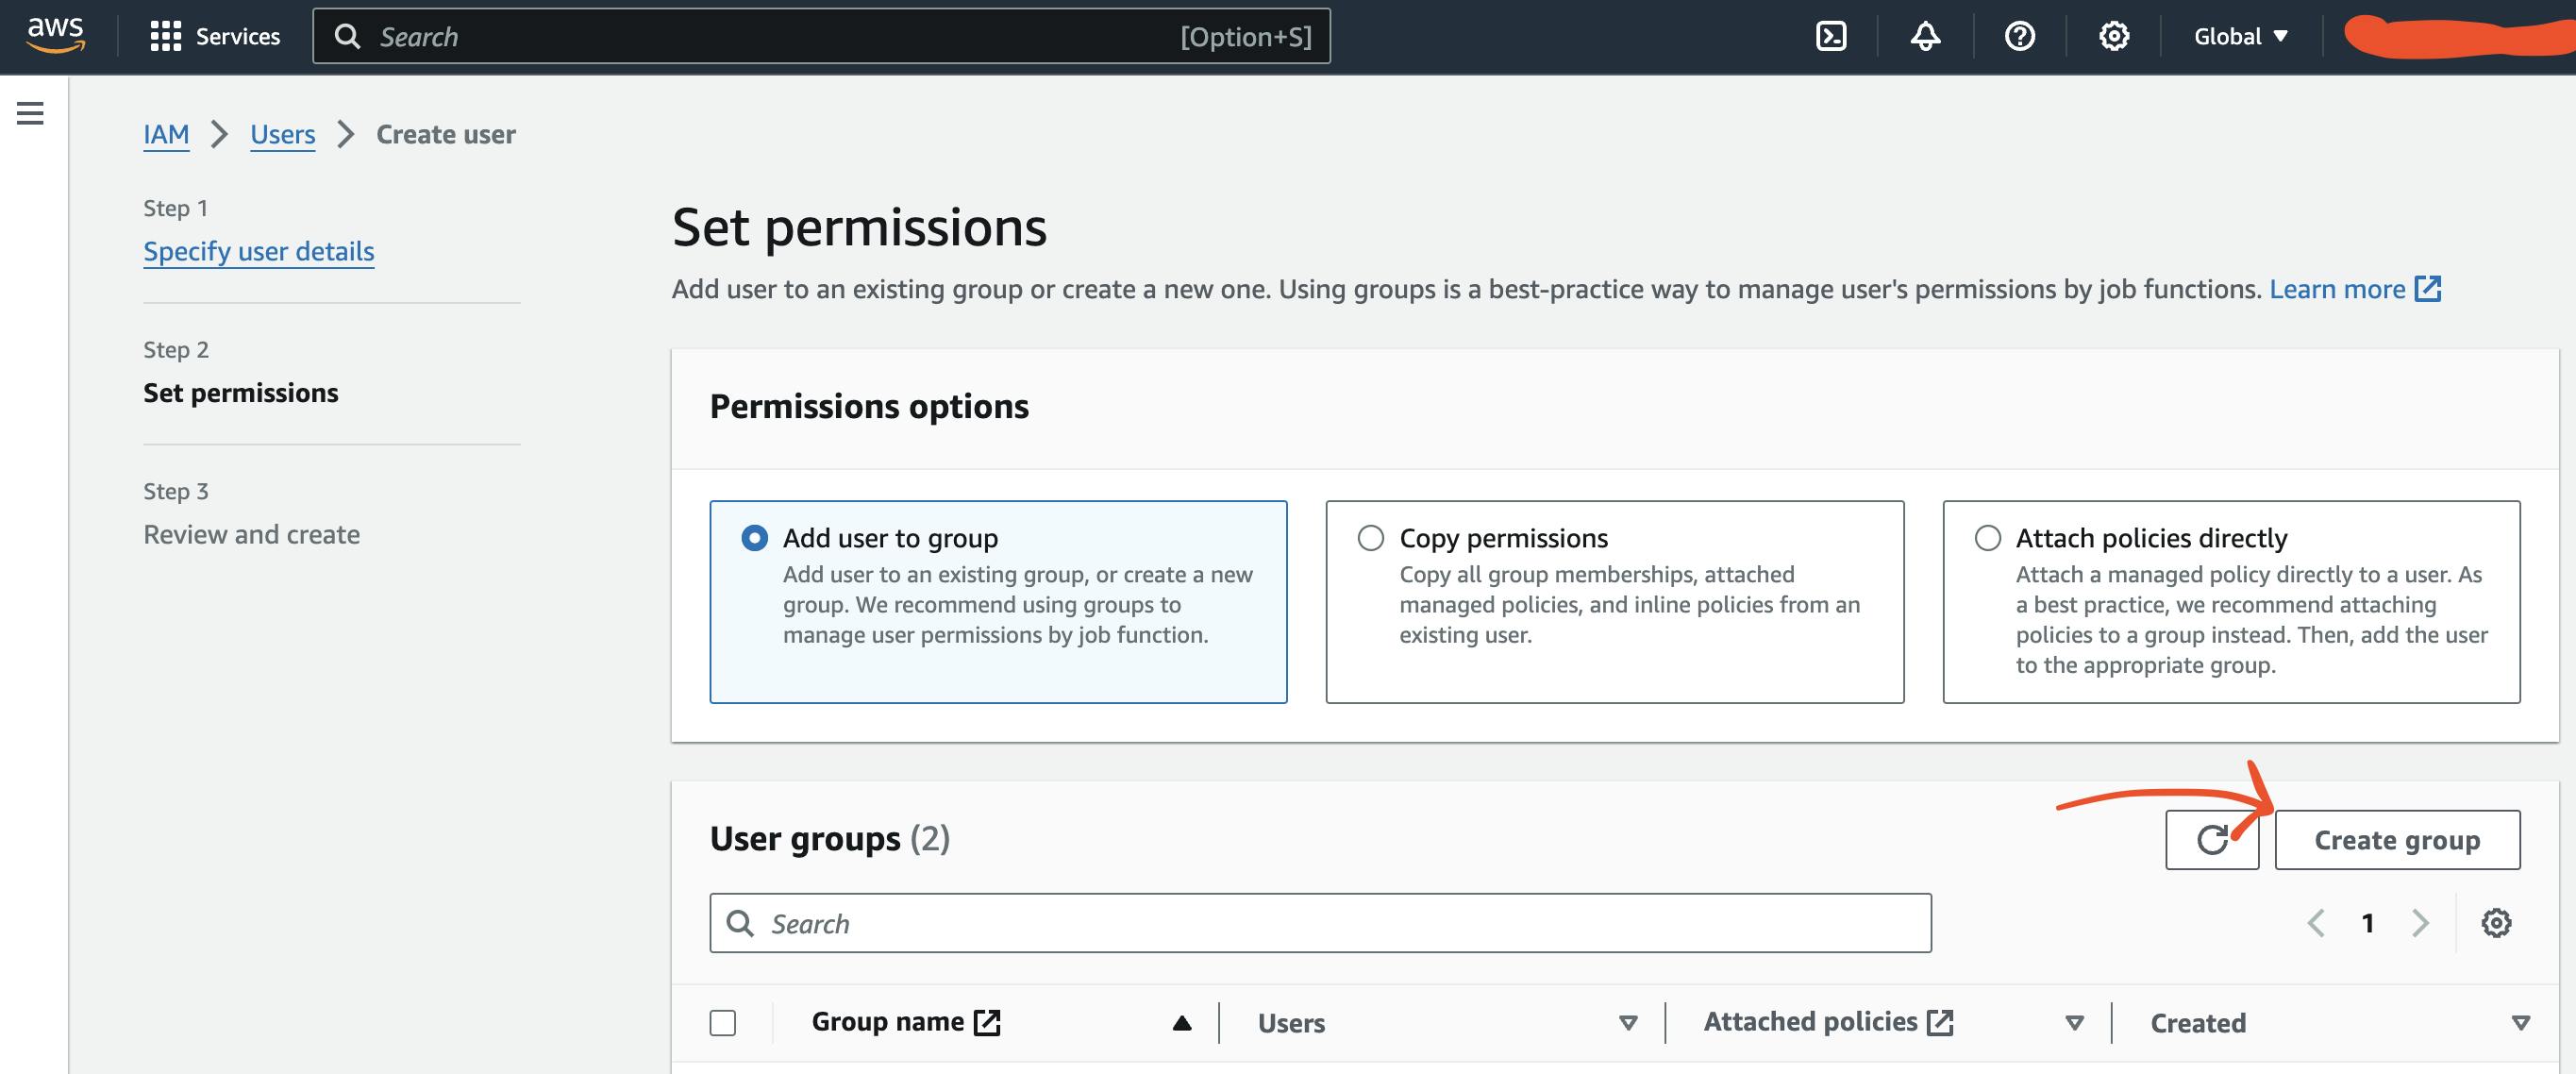
The next step involves creating a group and associating a policy with it. This practice is crucial as it follows the best practice of associating users with groups and then assigning policies (permissions) to these groups. Here's how you can do it:
Click on "Create group" and provide a name for the group.
After creating the group, assign a permission policy to it. It's essential to assign only the permissions that you want the user to be able to perform, following the principle of least privilege.
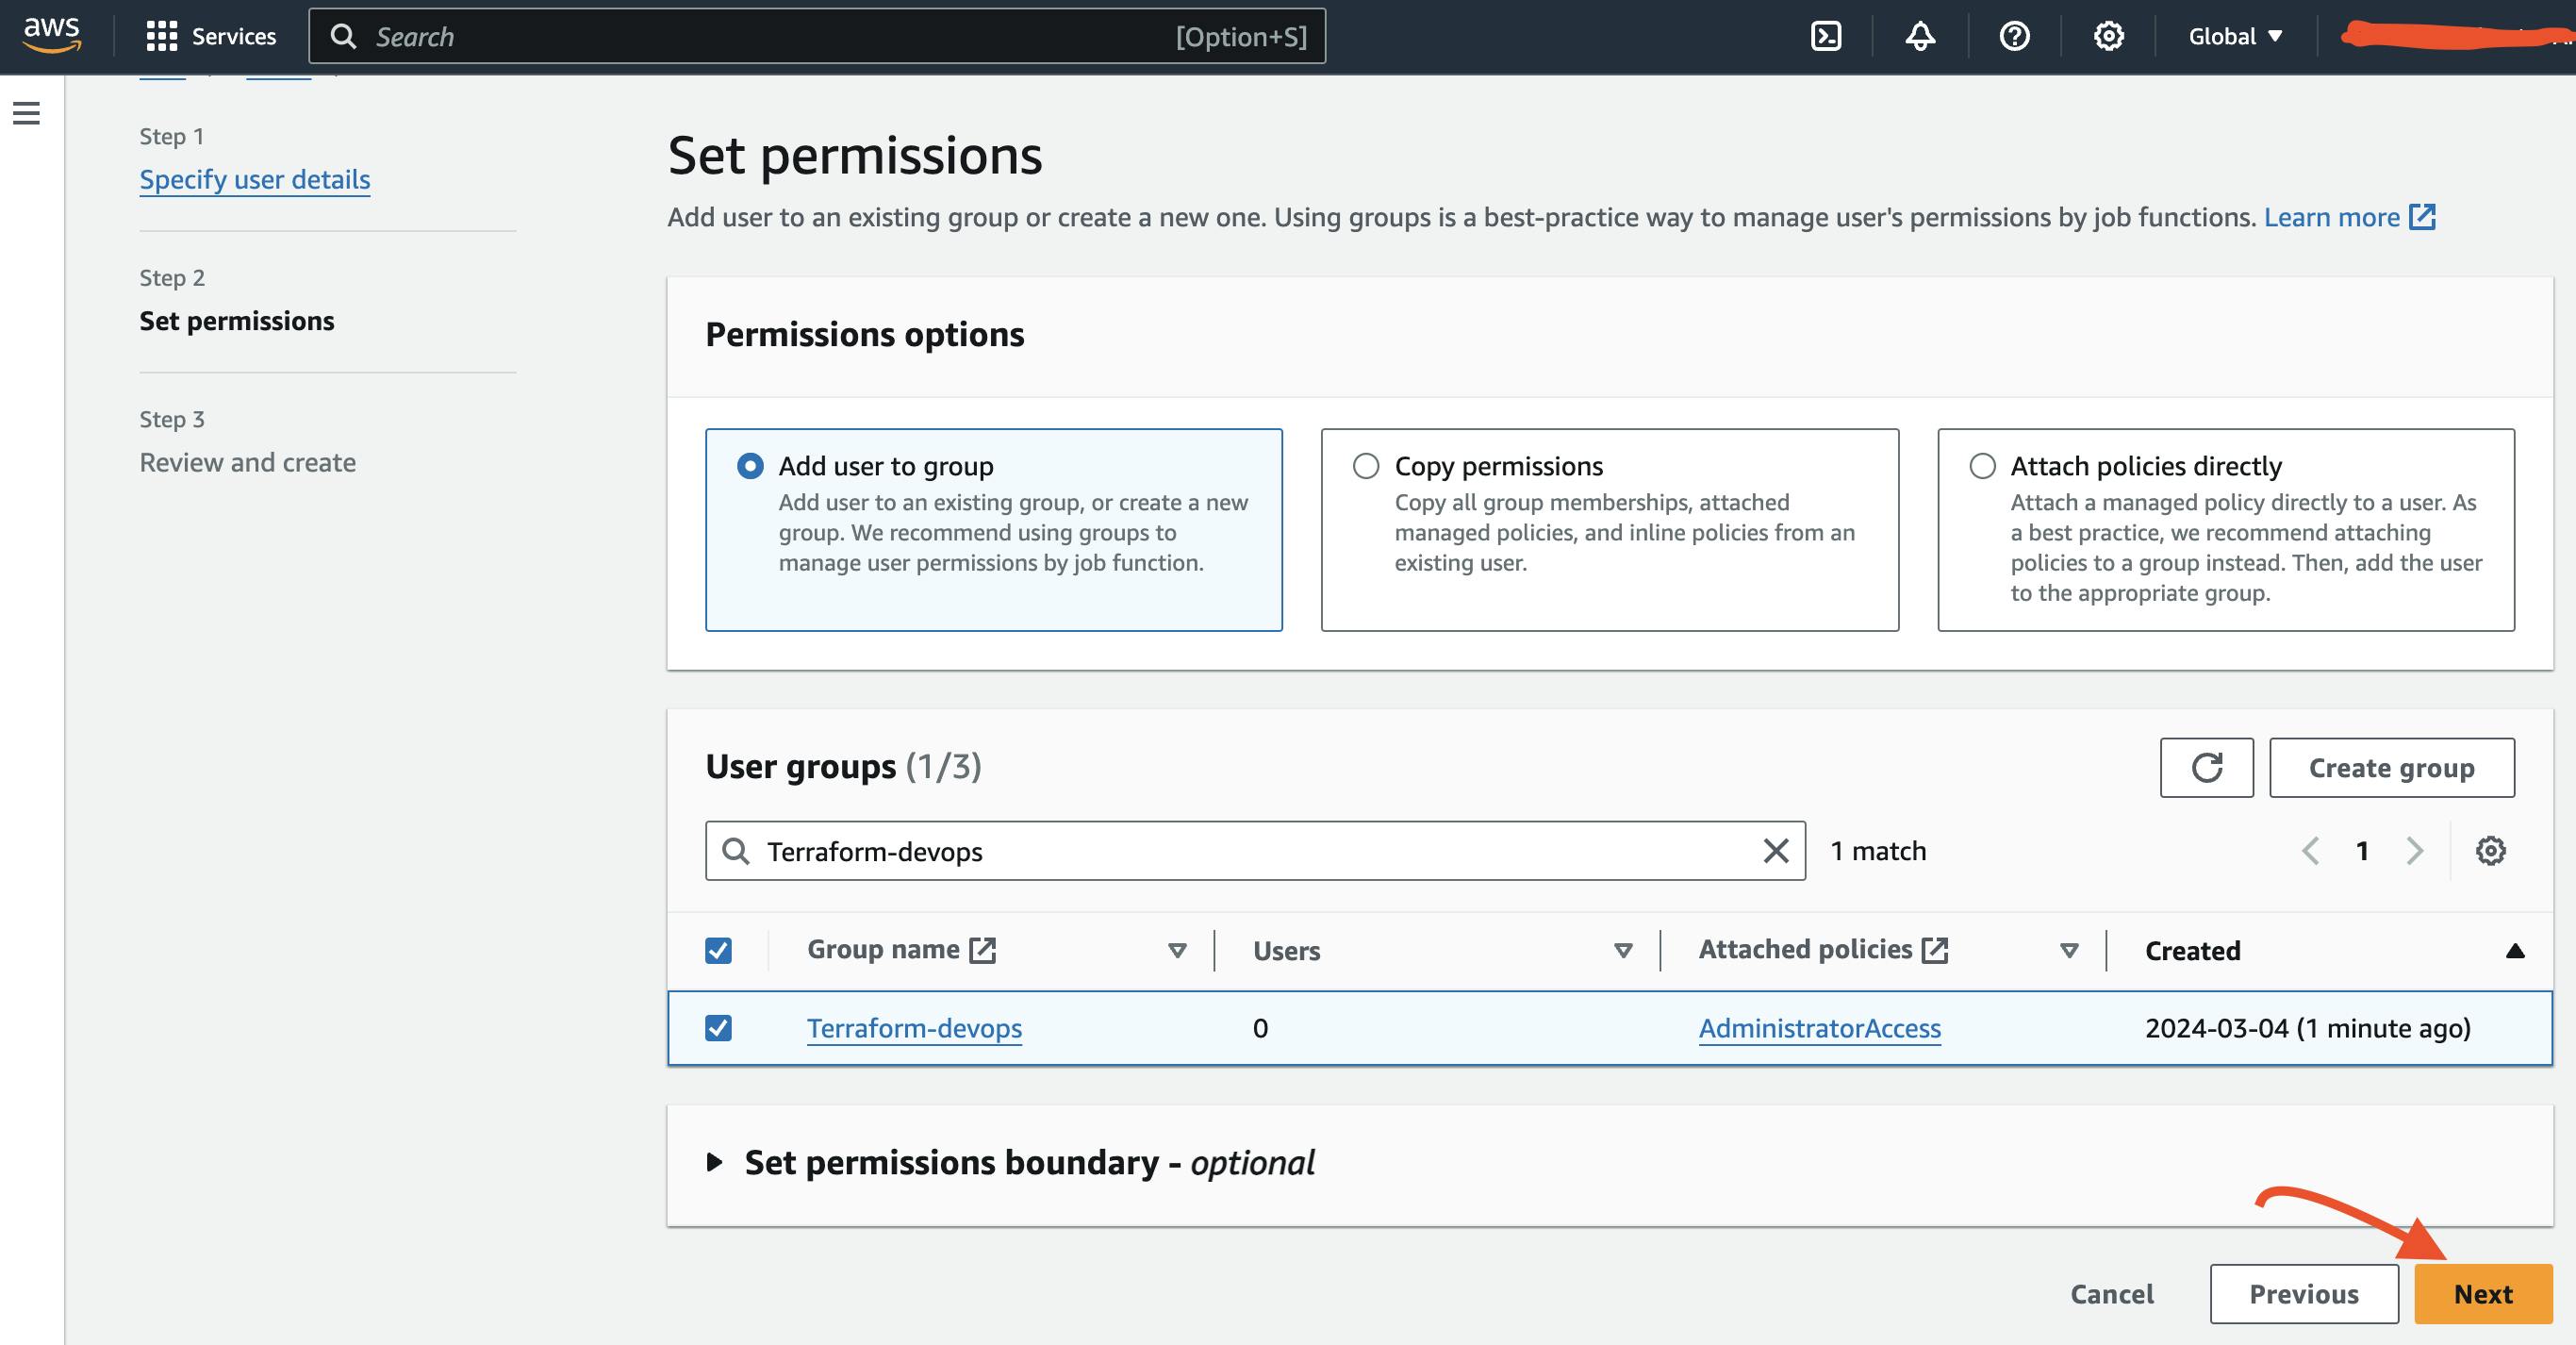
In this case, I will assign the "AdministratorAccess" policy to the group.

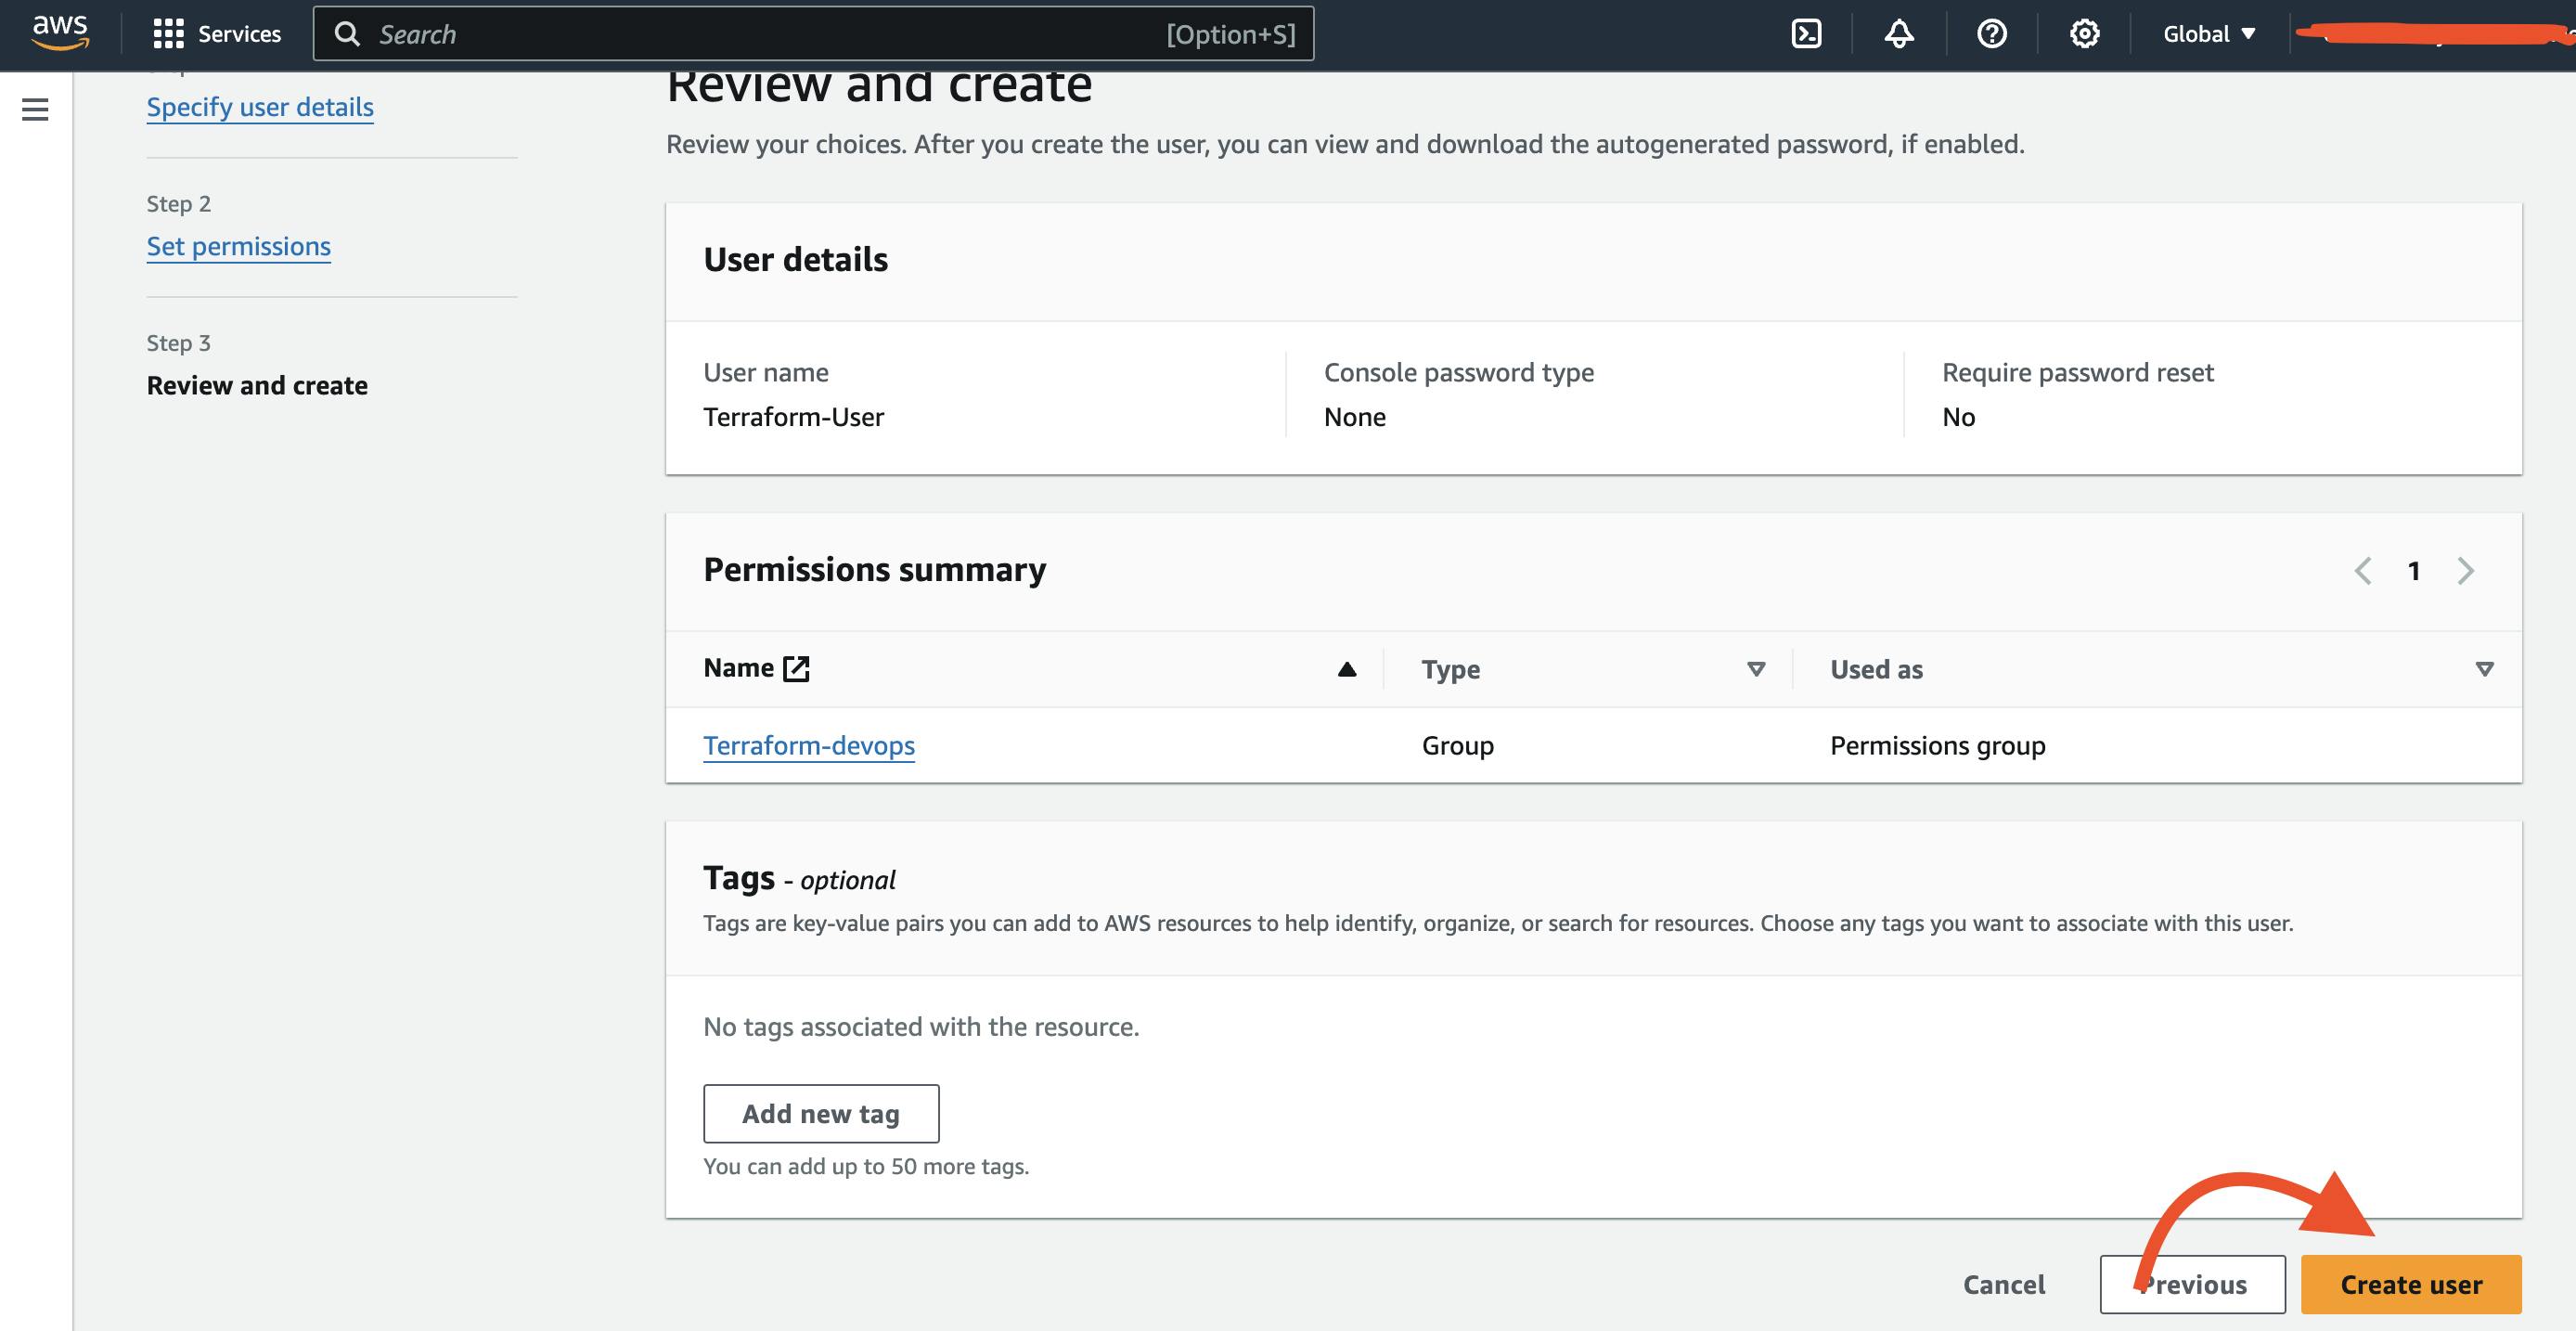
The last step is to choose the user group you made, click Next, check the information, and then click Create User.

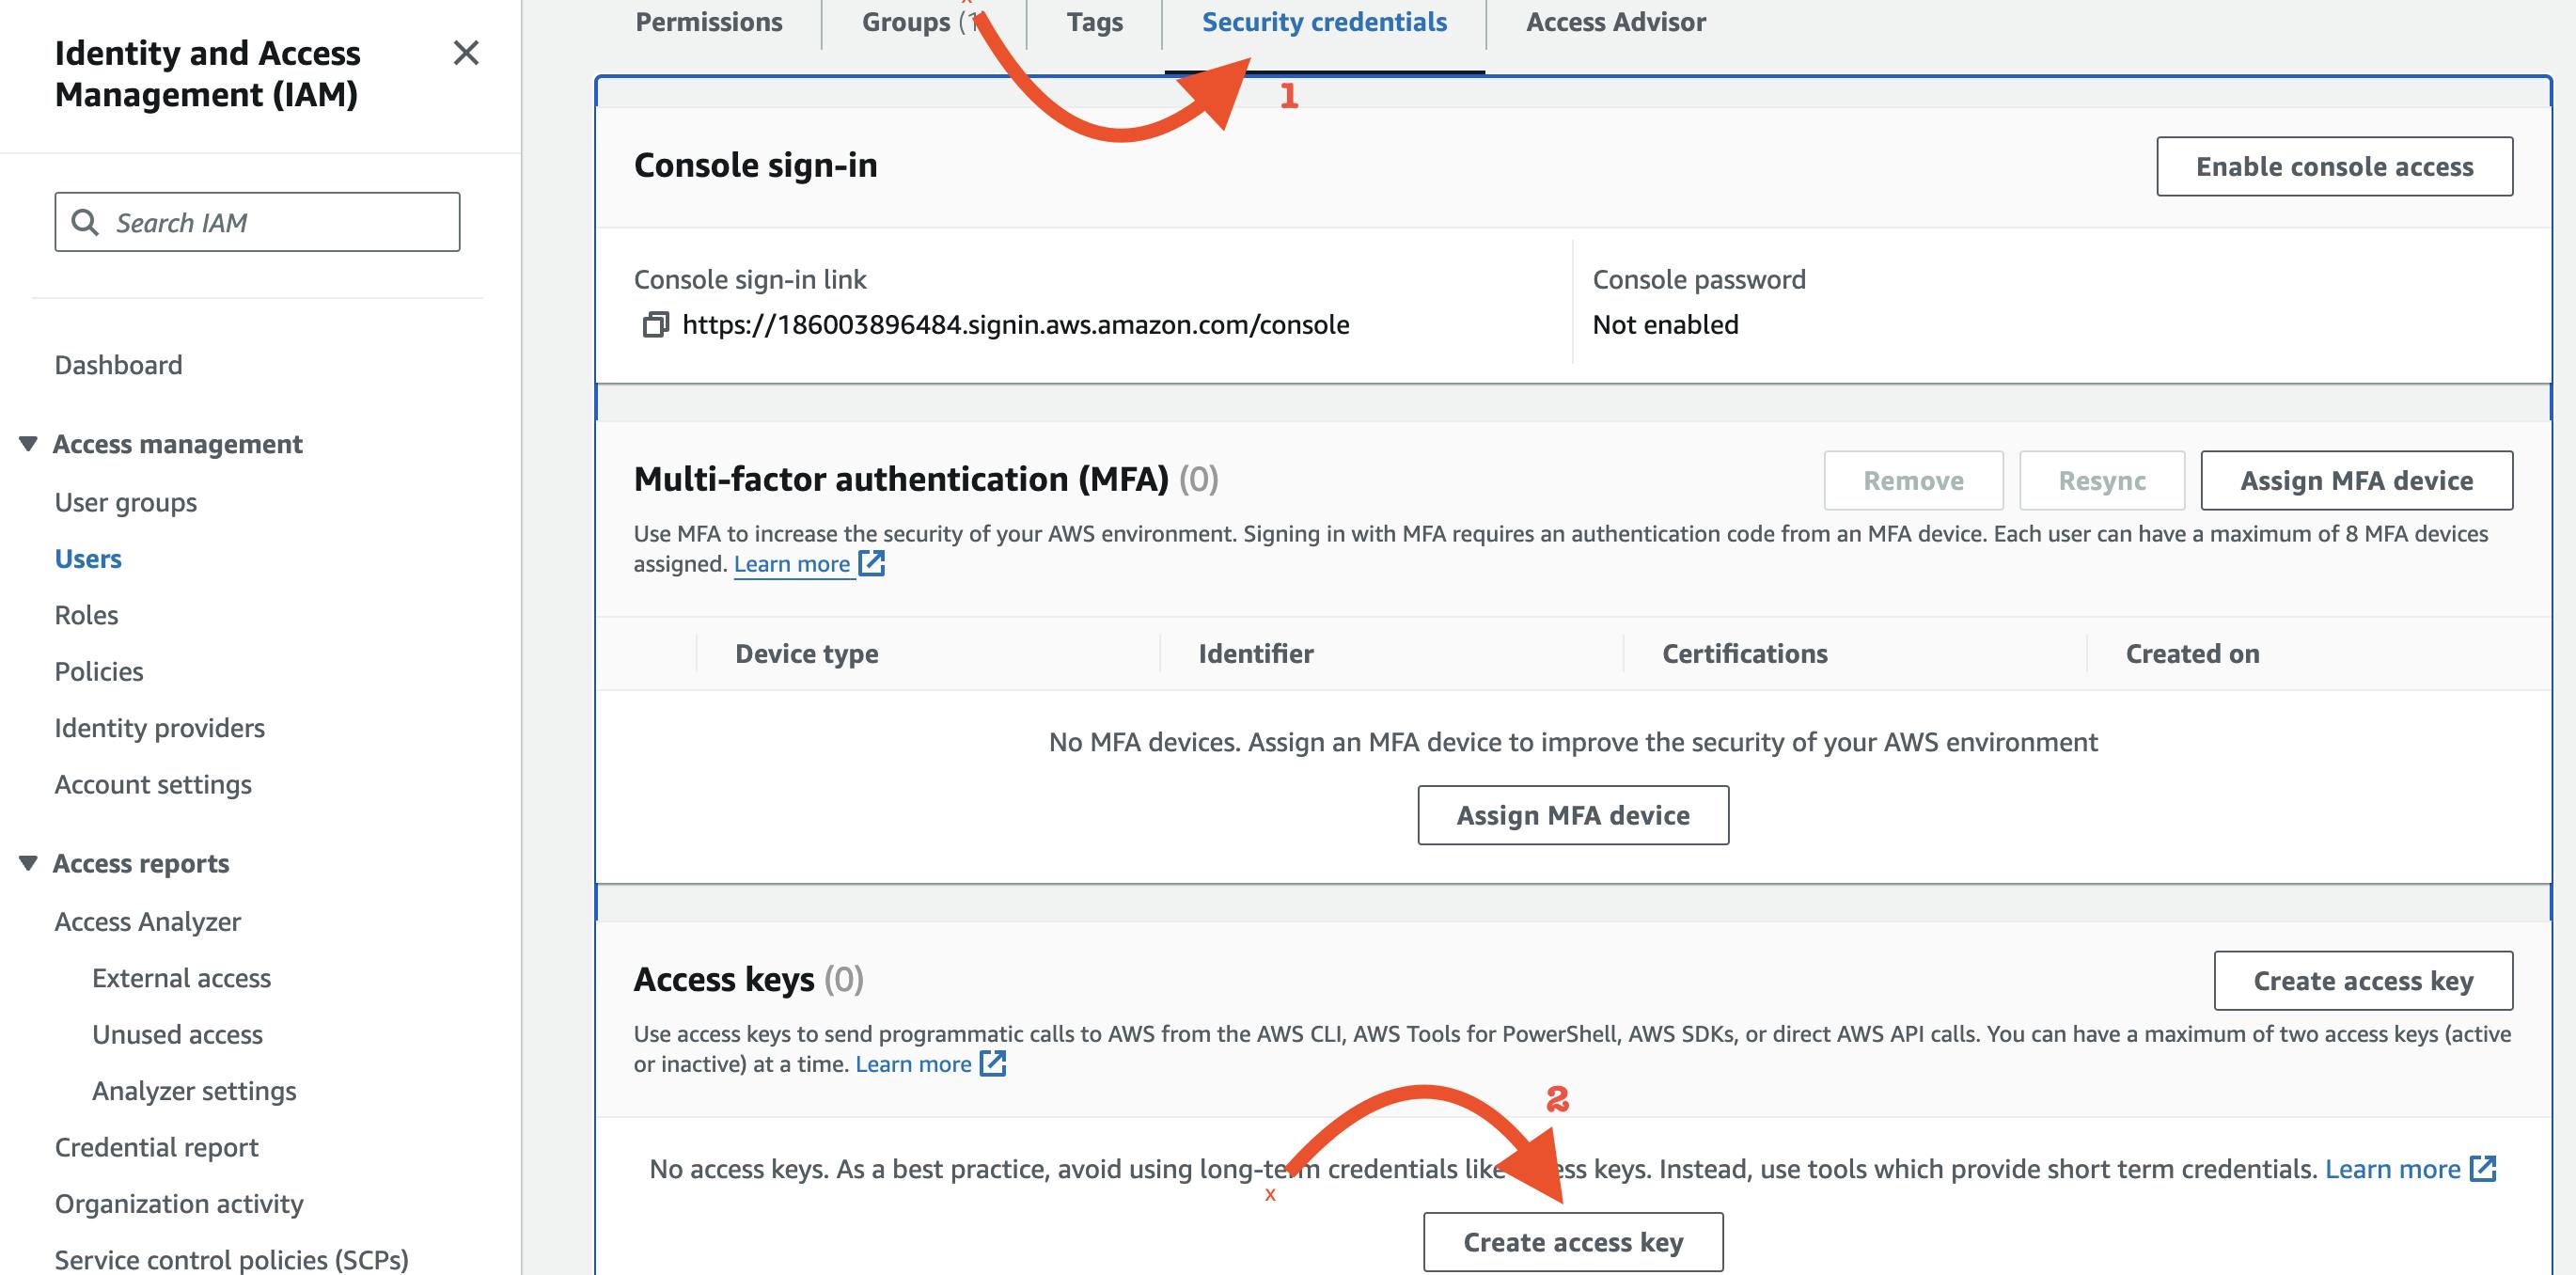
Following the creation of the user, select the user, click Security credentials, generate the access key, and download the key in csv.
STEP 2: Configuring AWS CLI
Download and install the AWS CLI from the AWS website.
Open a terminal or command prompt.
Run
aws configureand enter the IAM user’sAccess KeyIDandSecret Access Keywhen prompted. Also, specify your default region and output format (e.g.,us-east-1andjson). (Note: Do not expose your keys on the internet, I have deleted the keys before publishing this tutorial)
STEP 3: Installing Terraform
Next, install Terraform on your machine by downloading the appropriate package for your operating system from the Terraform website. https://learn.hashicorp.com/tutorials/terraform/install-cli?in=terraform%2Faws-get-started
Follow the installation instructions to extract and install Terraform.
Verify the installation by opening a terminal or command prompt and typing
terraform -v. You should see the Terraform version number if it's correctly installed.

STEP 4: Creating Your First Terraform Configuration
Now that we have set up our AWS account and configured the CLI, it's time to dive into Terraform and create our first infrastructure configuration. Follow these steps to define your AWS resources using Terraform:
Begin by creating a dedicated directory for your Terraform project. This directory will contain all the necessary configuration files. Open your terminal or command prompt and enter the following commands:
mkdir terraform-ec2 && cd terraform-ec2This will create a new directory named
terraform-ec2and navigate into it.Inside the
terraform-ec2directory, create a new file namedmain.tf. This file will contain the Terraform configuration for your AWS resources. Open the file in a text editor and add the following code:terraform { required_version = ">= 1.4.0" required_providers { aws = { source = "hashicorp/aws" version = ">= 5.0.0" } } } provider "aws" { region = "us-east-2" } resource "aws_instance" "example" { ami = "ami-08e6b682a466887dd" # Replace this with your desired AMI ID instance_type = "t2.micro" }This Terraform configuration defines an AWS provider for the
us-east-1region and creates an EC2 instance using a specific AMI and instance type. You can customize theamiandinstance_typeparameters as needed for your project.Initialize Terraform in your project directory. Run the following command to initialise Terraform in your project directory and download any necessary plugins.

After initializing Terraform, it's a good practice to validate your configuration to check for any syntax errors. Run the following command:

Before making any changes to your AWS environment, it's essential to review the actions Terraform will perform. Run the following command to generate an execution plan:

If the execution plan looks satisfactory, you can apply your Terraform configuration to create the specified resources in your AWS environment. Run the following command and confirm by typing
yes:
Once Terraform has finished applying the configuration, verify that the resources have been created successfully. You can check the AWS Management Console
commands to inspect the resources.

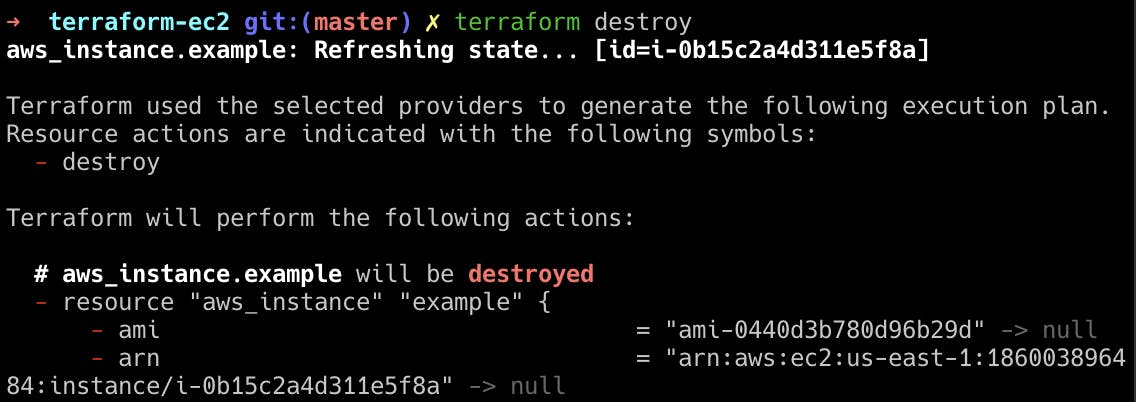
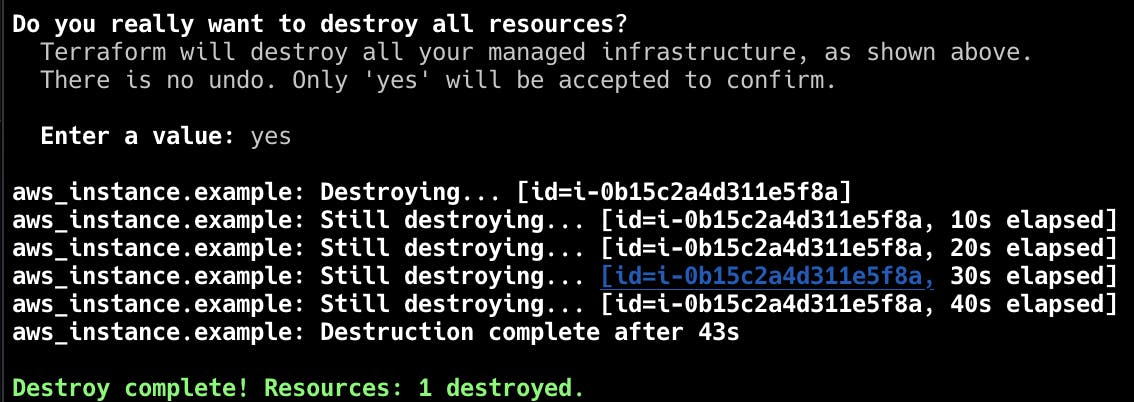
Avoid charges by running terraform destroy when done.
Conclusion
In conclusion, this guide has provided a comprehensive overview of getting started with Terraform and AWS. By following the step-by-step instructions, you've learned how to create an AWS user with programmatic access, configure the AWS CLI, install Terraform, and define your first Terraform configuration to provision an EC2 instance. Terraform's declarative syntax simplifies infrastructure management, empowering you to automate resource provisioning and streamline deployment workflows. With Terraform and AWS, you're equipped to efficiently manage cloud resources, enabling scalable and reliable infrastructure for your applications.